N
💻Developer by the day, 📝a student at night.
📷Photographer on vacations, 💭muser when it's quiet!
Jack of all trades, master of a few...
🖖Let us come together and learn something new!
Search for a command to run...
No comments yet. Be the first to comment.
ML lifecycle - https://www.coursera.org/learn/introduction-to-machine-learning-in-production This course introduces us to the ML lifecycle and some real life examples (yes, ML is not just used to predict house prices on a Jupyter notebook!). It walks...
For the ones migrating over from Windows/Linux ecosystem

SEO optimization, Functionalities, and PWA

Boost your system performance in just $135

In an era where AI is reshaping everything from search engines to social media, and data privacy feels more like a myth than a guarantee, I decided to take back control—starting at home. My homelab serves as both a tech playground and a personal fortress of autonomy. It gives me the freedom to run the services I rely on, store my data securely, and explore new technologies without handing over my digital life to third parties.
This setup isn’t about breaking things or chasing enterprise-grade complexity. It’s about building a space where I can experiment safely, learn continuously, and most importantly—own my data. And here’s the best part: you don’t need deep pockets or racks of expensive gear to get started. With a bit of curiosity and repurposed hardware, anyone can build a homelab that empowers them in this increasingly centralized digital world.
In this post, I’ll walk you through my setup, the tools I use, and how you can start your own journey toward digital independence—without spending a fortune.
[PS: Introduction drafted by AI!]
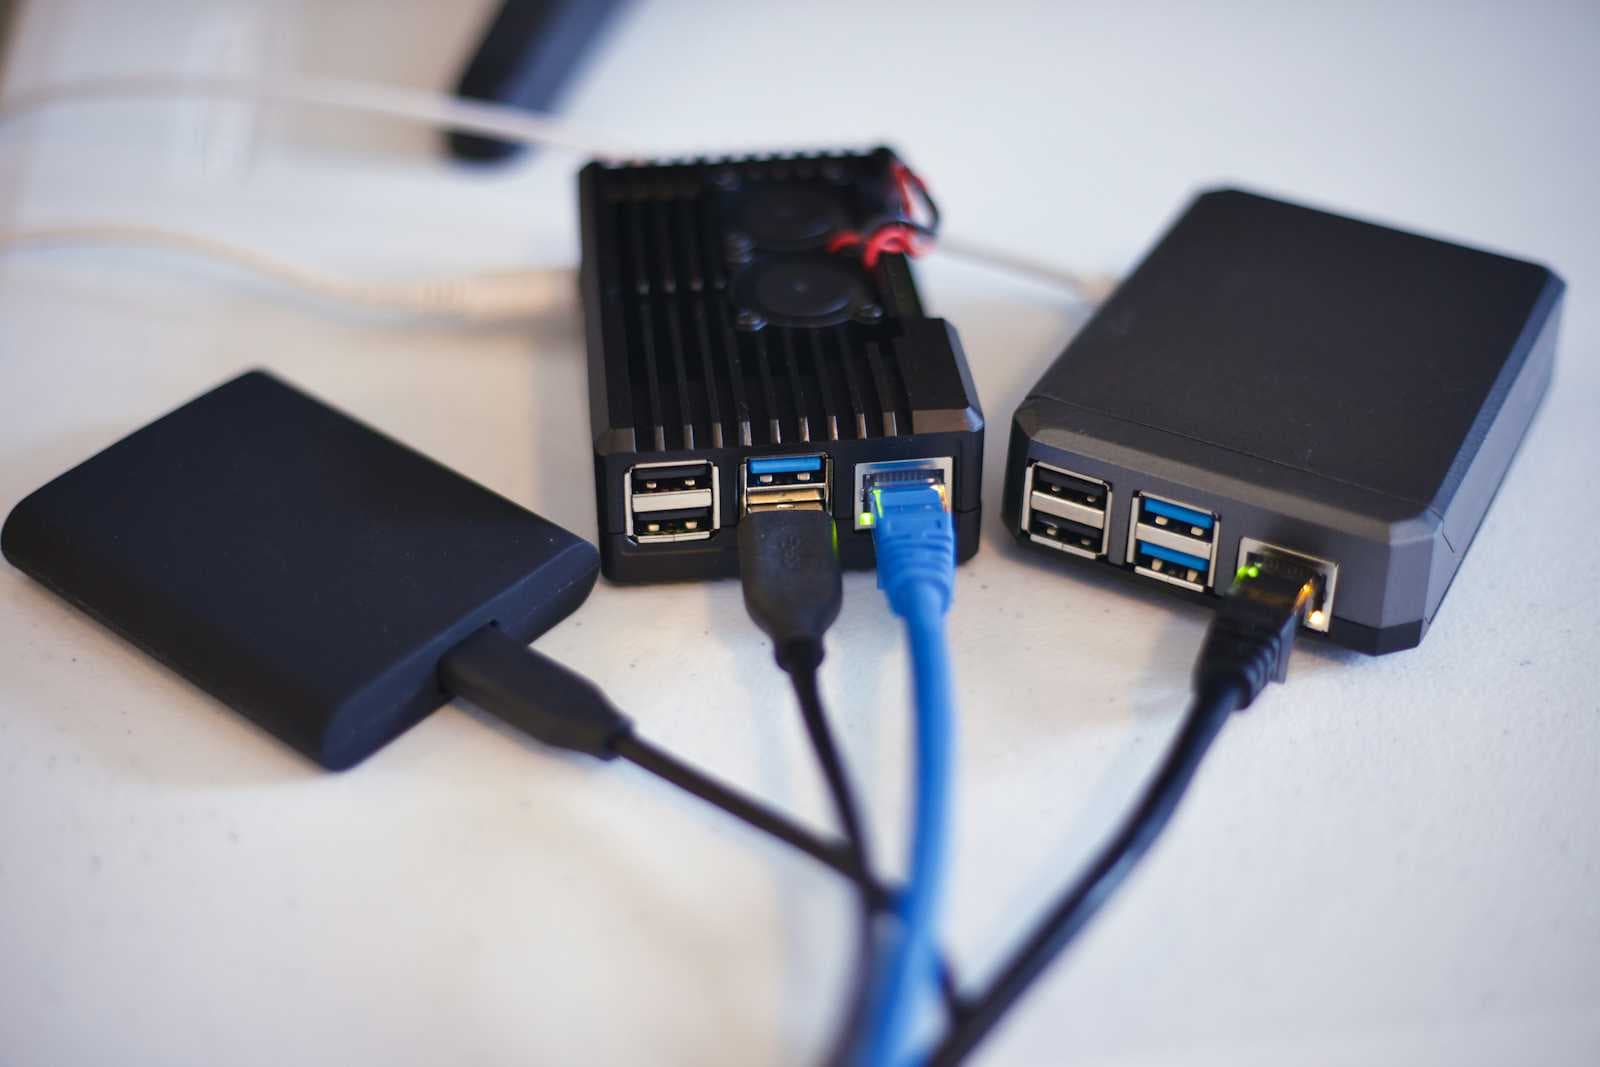
Before we dive in, i want to emphasize on how basic my home-lab is!

I am starting by using existing hardware.
For always on machine, I am using a Raspberry Pi. Things that qualify for this are:
Pi-hole (DNS & Network wide Add block)
Nginx Proxy Manager (Subdomain Routing & SSL Certs)
Home Assistant (Smart home)
n8n (Automation like Zipier)
For a little more demanding app, I am using an old laptop. Its not in the best shape, but with Core i7 and 16GB RAM, it is quite capable of handling reasonable workloads, with some ML use cases (like face recognition). I have upgraded it to a 1TB SSD instead of its old HDD. This machine is on during the day and suspended during night. It is hosting:
Immich (Photo organization and sharing app like Google Photos)
NextCloud (Cloud drive storage like One Drive, G Drive)
For more demanding workloads like video transcoding or LLM related tasks, I am using my Main PC (Ryzen 9, 32GB DDR4 RAM, RTX 3070). It has a primary 1TB SSD, with additional 2 4TB HDD. This is turned on only when needed as its highly power hungry, and I cannot afford to reduce its life by having it always on. This hosts (or will host):
Plex/Jellyfin (Media streaming)
Open Web UI (UI for local LLM chat)
Ollama (Run Open source LLM model locally)
For router, I am continuing to use the ISP provided router with limited configuration. This is one section I am looking to upgrade in the next phase.
Only the Pi is currently connected via LAN; everything else is on wireless.

Now let us understand why a component is there.
My router does not have the option to assign static IP to devices. By being on the LAN, and trying to reserve a higher IP value, my PI stays on that same IP. The router has a small power backup, but sadly the pi will die when power goes off. Since it auto starts and all services running on it also auto start, it is not a problem for now. Having a static IP enables me to add that IP in devices like TV where I cannot install a VPN client.
When everything is on my local network, I can get away with not using a VPN, and having every service available locally. But If I want my family to have access to some service, they will not be able to connect when outside my network. Moreover, they will not be able to remember machine names or IPs (which will keep changing randomly), and not to mention that the annoying security warning for missing TLS. Having a mesh VPN like Tailscale, allows me to assign each server machine a static IP that can be accessed only when folks are on the same Tailscale network. This solves 2 problems at once, accessibility with static IP as well as security. Other people I want to share with will need a Tailscale network of their own, and I can share my Pi with them.
I have a custom DNS running on Pi-hole (more on this later), and my Tailnet is set to use the Tailscale IP of my Pi.

We need a public facing DNS for issuing TLS certificates for my domains. The Cloudflare DNS is a catch all subdomain entry pointing to my Tailnet IP of Pi.
Example domain entry:
*.homelab.example.com → 100.80.50.60
This is the first service that I set up on my homelab. It works by blocking DNS requests to well known ad services. As long as other devices are using this as DNS, it will block out most of the adds. For phones and laptops connected to my Tailnet, it will automatically use this as we had set it up in the Nameservers.
Another task it performs is a local DNS server. We have a reverse proxy exposing my services at a subdomains under my own domain. It can be set up like shown below. The DNS Domain points back to the server running the reverse proxy (in this case its the same machine). The CNAME records each list out the subdomains and link it to the domain we set on the left.
Example entries:
DNS
homelab.example.com → 192.168.0.50
CNAME

This is a core component that exposes subdomains for each service. It works with LetsEncrypt to get SSL certificates from Cloudflare. Interestingly it seems it auto-renews certificates, something i was not aware of until i got messages from Cloudflare. These subdomains are then needed to be added to Pi-hole CNAME records. Even if the services are not using HTTPS, Nginx takes care of ensuring traffic is encrypted while in transit. Also note, it can expose services running on other machines as well, either though static IP (if available), or Tailscale IP (I am using this as i don't have static IP).
So Pi-hole + NPM together serve as a single entry point to the whole home network, and the only device that needs to be shared with other users to allow access.
This is a very good starting point for a personal homelab using existing hardware (almost no cost). I am running all services using simple docker compose. I am not concerned with redundancy or high availability as its just me and my wife using it (will expand out to parents), and we can live with downtime. Not all corporate fancy stuff needs to be incorporated in a simple setup.
The part that is currently giving me bad sleep is lack of Backup strategy. If any of the storage devices fail, I'll be at a loss. Have some ideas, but have not got around to trying it out. I have a lot of space on my desktop, but having backup software like BorgBackup over network is turning out to be a pain. Once I fix that, will update that step.
If you are experienced with homelabs, let me know what I can improve, or how you are handling backups across machines!