# Turbocharge your Jekyll Website
Jekyll is a static site generator based on Ruby. It is a popular option for creating simple blogs with more focus on the content.
*From https://jekyllrb.com/*
There are a lot of simple templates available to jumpstart, and they are compatible with GitHub Pages. You just start writing `Markdown` files and you can have a site up and running in no time! But oftentimes, it will not be optimized. Here is a list of things that are often not part of a free template:
1. Google Analytics
2. Sitemaps
3. RSS/ATOM feed
4. E-mail Subscription
5. Comments
6. Progressive Web App (PWA)
All these results in a suboptimal experience for the users. With some simple enhancements, we can boost up the [Lighthouse](https://developers.google.com/web/tools/lighthouse/) score of our site a lot.
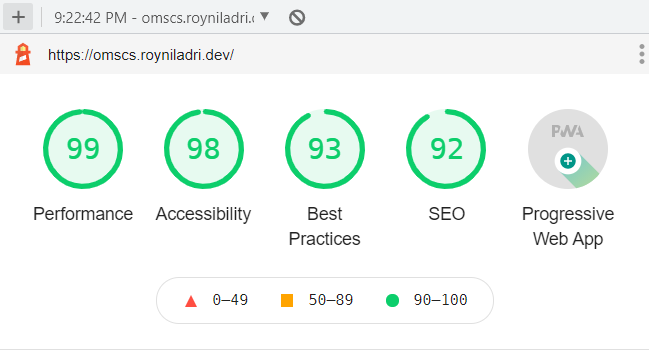
*Site Score on Lighthouse*
> Excellence/Perfection is not a destination; it is a continuous journey that never ends. - Brian Tracy
TLDR: [Show me the code](https://github.com/royNiladri/omscs-journey) [Show me the site](https://omscs.royniladri.dev/)
⚠ **Prerequisite Alert**: This article will assume you have a basic understanding of how a Jekyll site works. Refer to the [Folder Structure](https://jekyllrb.com/docs/structure/) for a quick overview of the project resources.
## Adding Google Analytics 📈
Head over to [Google Analytics](http://analytics.google.com/) and click `Start Measuring`. You can follow the steps to enlist your webpage. If you want a step-by-step guide for the same, check the [official doc](https://support.google.com/analytics/answer/9304153#zippy=%2Cweb). Once that is done, head over to the Jekyll project and add the GA property id in `_config.yml` as:
```yml
google_analytics: UA-XXXXX
```
You would probably want analytics to run on all thee pages, and hence need to add the script at the base layout. For most projects it should be at `_layouts/default.html`. Add the following in the head section:
```html
{% if site.google_analytics %}
{% endif %}
```
Now, this you can use in all your future project templates. This will not be rendered when you do not specify the `google_analytics` key in `_config.yml`
## Sitemap 🗺
Sitemaps are documents (can be .txt, or .XML) that list the locations in the webpage. They help search engine crawlers to crawl all the pages of your site for better search results. This can be easily added using a Jekyll plugin:
```yml
plugins:
...
- Jekyll-sitemap
...
```
This should generate a page at the root level `/sitemap.xml`. You can now add this to [Google Search Console](https://search.google.com/) and enjoy indexing benefits!
## RSS/ATOM Feed 🔔
There is again an easy way out with the [jekyll-feed](https://github.com/jekyll/jekyll-feed) plugin. Add the plugin, do a bundle install and the feed should start appearing at `/feed.xml`.
```yml
plugins:
...
- Jekyll-feed
...
```
Now your users can subscribe to the feed to get notified when you write a post!
## E-mail Subscription 💌
If you want to give your users a way to be contacted when you want to announce something, you can set up an email subscription. One popular option is to use [MailChimp](https://mailchimp.com/). There is a free tier that should be sufficient for most starting bloggers.
Once you set up an account there, Click on `Create` > `Signup Forms` > `Embedded form`
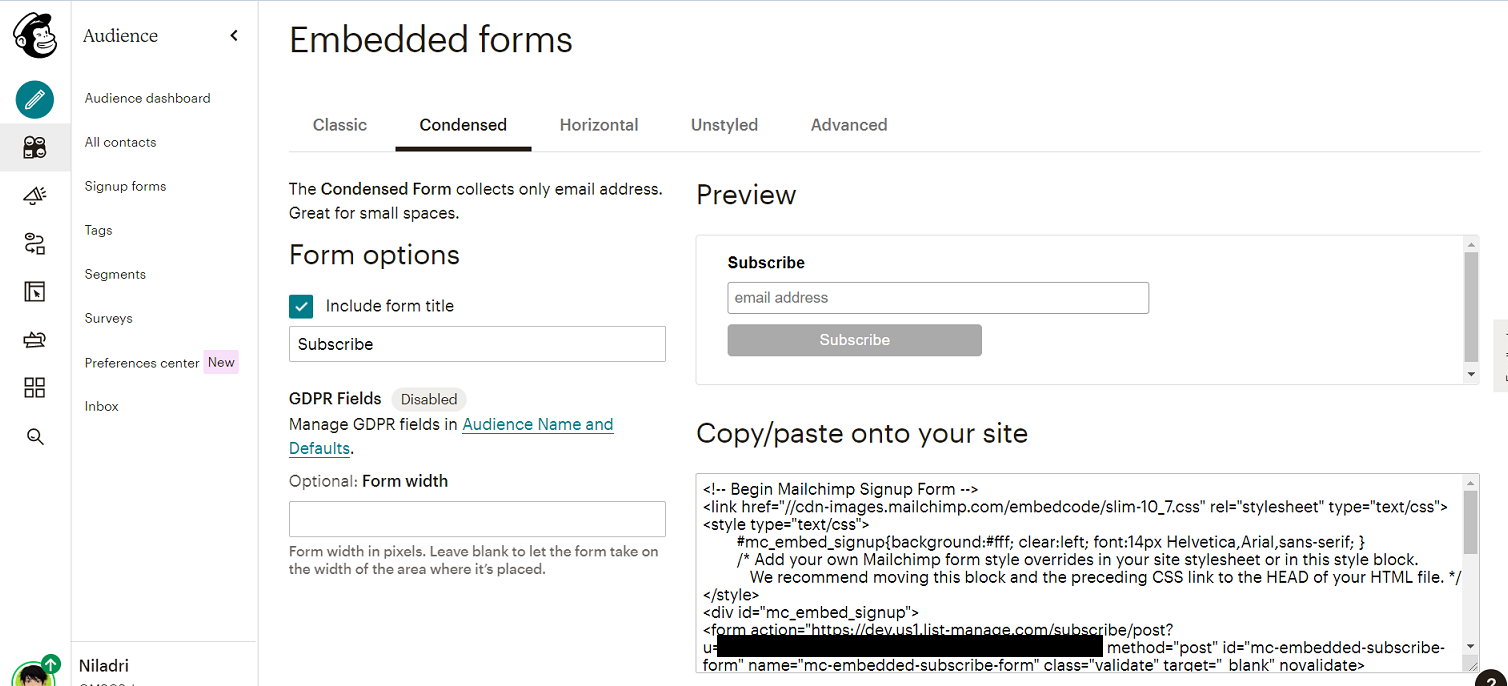
Now you can copy the code given and paste it under _includes. You can modify the HTML and CSS to make it look and feel in tune with your existing theme. Assuming you created a partial called `mailchimp.html`, you can include it in different `layouts`.

After adding my customizations, it looks like this. Much better right?
## Comments 💬
There are some options in this space. Some have privacy concerns, while other need hosting. So a hacky way is to use GitHub issues as comments. Some wrappers make it easy. One such example is [Utterances](https://utteranc.es/).
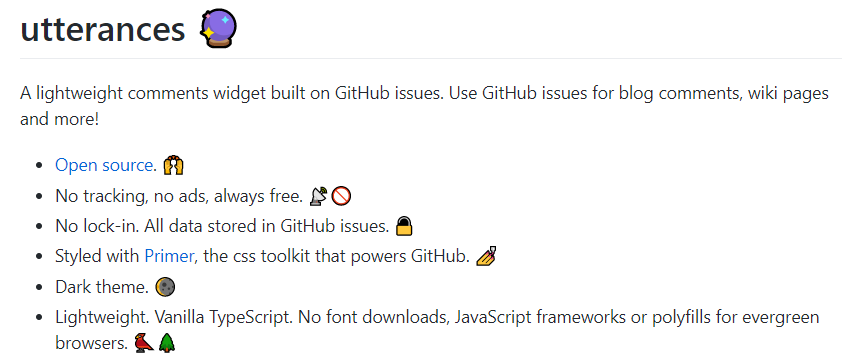
It is simple and easy to set up. Just add permissions to the repository and add a small script in the layouts that require comments. Ensure to add `async` to ensure it does not impact load time.
## Progressive Web App (PWA) 📱
Enhancing a web app to a PWA has certain benefits. It will take more than a series to explore the nitty-gritty details of PWA (I'll keep adding articles). For a brief introduction, you can check my post on [JS Service Workers](https://ones-zeros.royniladri.dev/js-service-workers-an-introduction). In this section, we will enable the PWA feature with a basic `manifest.json` and install a service worker that caches the pages when you visit them so that you can still use the site when offline. For this, I have mostly followed the tutorial from [Meteoric Teachings](https://alokprateek.in/articles/jekyll-pwa/) by *Alok Prateek*. After you are done with the changes, Lighthouse (Chrome inspector tab) nags about a few things. You can read the details about those by checking the reference links in the Lighthouse tab. Let us fix those!
### Custom Splash Screen
Add an icon asset to the manifest.json file that is at least 512x512.
### Maskable icon
Add a maskable icon in the manifest.json file which is at least 192x192.
```JSON
{
"src": "/assets/images/gt-logo-maskable.png",
"sizes": "240x240",
"type": "image/png",
"purpose": "maskable"
}
```
You can turn an image to its maskable format using the [Maskable.app Editor](https://maskable.app/editor)
### Apple touch icon
Add a link tag in the `head` of the default layout.
```
```
## Bonus SEO optimizations 🧪
- Add description and title to all the pages/posts
- Add thumbnails for social media share
```
```