


From index.html to a website on a custom domain
Foreword
This post assumes you know how to build a static website and merely touches over the options. This is intended as a deployment guide.
Building a website
There are a lot of options to host static content. While most content creators would prefer the comfort of a service like WordPress, as a developer, I tend to prefer a little more control. GitHub Pages provides both freedom and version control. The decision tree is just getting started here! You can create a website in GitHub using either of the following two ways.
GitHub Pages template using Jekyll
There are some basic templates provided by GitHub Pages as jumping-off points. You can consider them as some sort of theme, and build based on top of that. The pages can be written in HTML or Markdown, and you can add styles and scripts to enhance functionality and experience. This uses Ruby to build the contents and might need some learning and getting used to before you can properly control it. Find more details about this option at Jekyll. The benefit of using this option is that GitHub handles the building and rendering the site.
Using a UI framework of your choice
You can use any of the prevalent UI frameworks like Angular, React, Vue, and the sorts to generate a static site. You have to build the artifacts and configure GitHub Pages to render the contents of the build or dist folder. More options here:
- You can build the source code and commit the folder to be served
- You can set up a build pipeline (I prefer Travis CI).
As Uncle Ben once said, “With great power, comes great responsibility”.
Default Hosting
On your repository, if you visit the setting sections and scroll down to GitHubPages, you’ll find the option to select a branch and root folder. By default, nothing will be selected. See below a basic setting that will create a page with the root folder, and use the README.md or index.html as the starting point. The hosted URL will be of the form:https://<username>.github.io/<repository-name>
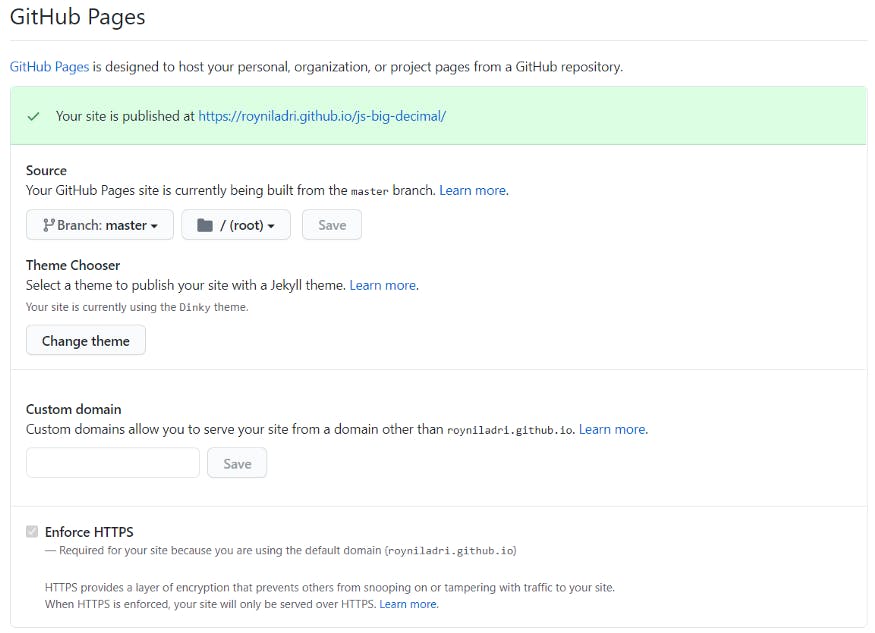
The site is now hosted on GitHub, using your username as a sub-domain. This is a good place to start and see changes. GitHub Pages is available only for public repositories for free members.
Porting to a custom domain
There comes a certain point in life where you want more! So one fine morning, you purchase a domain. There are again a lot of options out there and needs a post of its own. For context, I purchased mine from Google domains, and it will cost me about a thousand Indian Rupees per year. As your hairs start greying, you’ll make more websites, which might be related to the same domain. Instead of purchasing multiple domains for a group of things, we can leverage the same one, thus reducing cost.
The bad idea
Set up different subprojects and make folders inside the build directory. This will work, but the change of themes as the user browses through the same website will baffle them, not to mention that hosting different websites as subfolders will be unprofessional (example, mark.com/facebook, mark.com/instagram and so on). [Disclaimer: The author just came up with these links and are not meant to be visited. The author, aka me, will not be responsible for any or all losses incurred in an attempt to navigate to the aforementioned links.]
Subdomains to the rescue
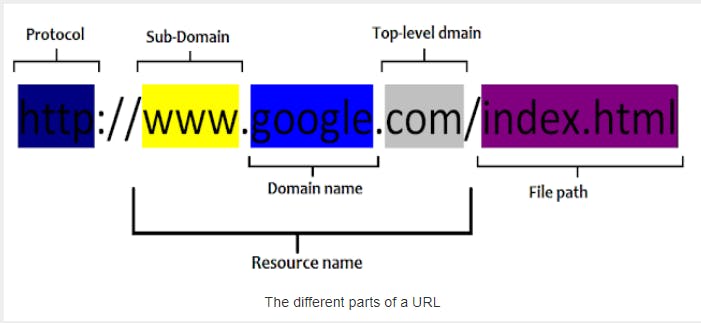
Yes, www is a subdomain. The subdomain is an optional part and can be committed (check Medium URL). Generally, the apex domain (medium.com) and subdomain www (medium.com) point to the same resource or are redirected. We can use subdomains to host different sites, all under the same domain name. Continuing the example from above, the two sites now will be facebook.mark.com and https://instagram.mark.com.
Let us jump to the configurations now.
Configurations
Step 1: Setting up A record
You need to configure the A record so that it points to the Github Pages servers. The screenshot below shows the configuration for my domain. The IPs will be the same, but it is better to read some more about this from the GitHub doc.
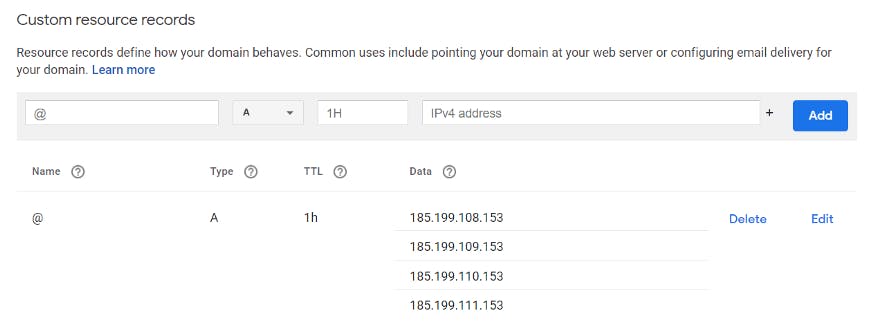 A record configuration
Step 2: Setting up a subdomain
This is the easiest step, as shown below- just add a CNAME record to point to your GitHub URL (remember .github.io). Generally, this takes a while to set up.
 CNAME configuration, by Niladri Roy
Step 3: Configuring GitHub
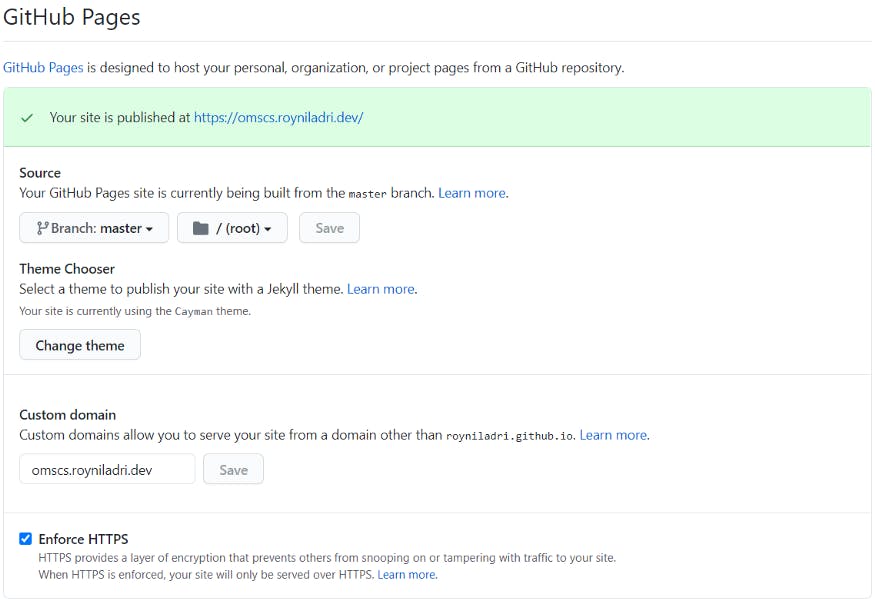
Back at the GitHub repository settings page, fill in the box for “custom domain” and hit save. It will need some time to take effect. If your domain uses HTTPS, you can enforce HTTPS. This option will be enabled once the other things are set up by GitHub. A file called CNAME will typically be committed to the root of your repository by default. If this file is missing, please add one with the following details:
[subdomain.]domain-name.top-level-domain
In my case, the resulting line is omscs.royniladri.dev (no protocol or slashes). It should contain just this line and nothing else. The subdomain is in square brackets because it is optional — you can host a GitHub Pages website on the apex domain.
 GitHub Pages using a custom domain
After all the settings are done, check back in an hour to find your newly hosted site. The icing on the cake is the fact that the old URL still works. If you had shared your .github.io URL, all future requests are automatically forwarded to use the custom domain with no additional setup.
May the domain be with you! — A curious developer
[P.S. If you are interested in checking out the site, visit OMSCS Journey.]
Love what you see? Follow me or subscribe to the newsletter to stay updated when I post more cool stuff!